
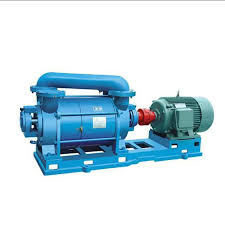
تعمیر وکیوم Vacuum Pump Repair
تعمیر وکیوم Vacuum Pump Repair
Repairing a vacuum pump can be a complex task, but with a structured approach, it can be managed effectively. Here’s a step-by-step guide to help you through the process:
۱٫ Identify the Problem
– Symptom Check : Common issues include reduced performance, unusual noises, leaks, or oil contamination. Identify any symptoms to diagnose the problem.
– Visual Inspection : Look for visible damage, leaks, or loose connections. Check for oil levels and condition.
۲٫ Safety Precautions
– Power Down : Ensure the pump is turned off and disconnected from the power source before starting any repair work.
– Protective Gear : Wear appropriate personal protective equipment (PPE) like gloves and safety glasses.
۳٫ Consult the Manual
– Manufacturer’s Instructions : Refer to the vacuum pump’s manual for specific troubleshooting and repair guidelines. It may include diagrams, parts lists, and detailed procedures.
۴٫ Disassemble the Pump
– Remove the Cover : Carefully remove the outer cover or housing of the pump to access internal components.
– Document Assembly : Take notes or pictures of the assembly to ensure you can reassemble it correctly.
۵٫ Inspect and Diagnose
– Check Components : Inspect internal parts like bearings, seals, rotors, and valves for wear, damage, or contamination.
– Test Moving Parts : Ensure that all moving parts are functioning smoothly. Look for any signs of sticking or excessive play.
۶٫ Perform Repairs or Replacements
– Clean Components : Clean any dirty or contaminated parts using suitable solvents or cleaners. Ensure all parts are dry before reassembly.
– Replace Worn Parts : Replace damaged or worn parts such as seals, gaskets, and bearings. Use OEM (Original Equipment Manufacturer) or equivalent parts.
– Lubricate : Apply appropriate lubrication to moving parts as specified in the manual.
۷٫ Reassemble the Pump
– Follow Documentation : Reassemble the pump in the reverse order of disassembly. Refer to your notes or pictures to ensure proper reassembly.
– Check for Leaks : After reassembly, check for any leaks around seals and connections.
۸٫ Test the Pump
– Initial Test : Power up the pump and observe its operation. Listen for unusual noises and check for smooth operation.
– Performance Check : Verify that the pump achieves the expected vacuum level and operates within normal parameters.
۹٫ Regular Maintenance
– Schedule Maintenance : To prevent future issues, adhere to a regular maintenance schedule, including checking oil levels, changing oil, and inspecting components.
– Record Keeping : Keep detailed records of repairs, maintenance, and any issues encountered for future reference.
Common Issues and Solutions
۱٫ Reduced Performance :
– Check for Leaks : Inspect and replace seals if necessary.
– Clean Filters : Ensure filters are clean and not clogged.
۲٫ Unusual Noises :
– Inspect Bearings : Replace if worn or damaged.
– Check for Foreign Objects : Remove any debris or foreign objects inside the pump.
۳٫ Oil Contamination :
– Change Oil : Replace contaminated oil with fresh, clean oil.
– Inspect Oil Seals : Replace any faulty oil seals.
۴٫ Overheating :
– Check Cooling System : Ensure that the cooling system is functioning properly.
– Inspect for Blockages : Clear any blockages in ventilation or cooling channels.
If the problem persists or if you’re unsure about any aspect of the repair, it may be best to consult with a professional or contact the manufacturer for support.
اجکتور با کندانسور تماس مستقیم
اجکتور با کندانسور پوسته و لوله
وکیوم چیست و پمپ وکیوم چه کاربردهایی دارد؟
پمپ وکیوم شیمادزو ژاپنی
بین وکیوم آبی و روغنی کدام را بخریم؟
روغن پمپ وکیوم توتال Pv 100
روغن پمپ وکیوم کاسترول Vacuum pump Oil H
تعمیر وکیوم Vacuum Pump Repair
آموزشهای فنی تعمیرات پمپ های وکیوم و بلوئر هوادهی
روغن موتور وکیوم SUNOCO
دیدگاهتان را بنویسید